Main board
- ESP32S Dev Board · ESP-WROOM-32 (the classic black module)
Build Guide
Everything you need: parts, wiring, CAD and firmware. You can put one together in an afternoon if you already have an ESP32 lying around. Solder skills are optional but a small breakout board makes life easier.
Parts
Tip: a small ESP32 breakout board is optional but highly recommended. It makes life much easier when two wires need to share a single pin.
Wiring
Two shared rails: every 3.3V pin lives on the same line, every GND pin on another. The TFT VCC is the one exception, it goes to VIN (5V) because the DIYmalls board has a built-in 3.3V regulator on the panel.
Schematic overview
LUMA · v3
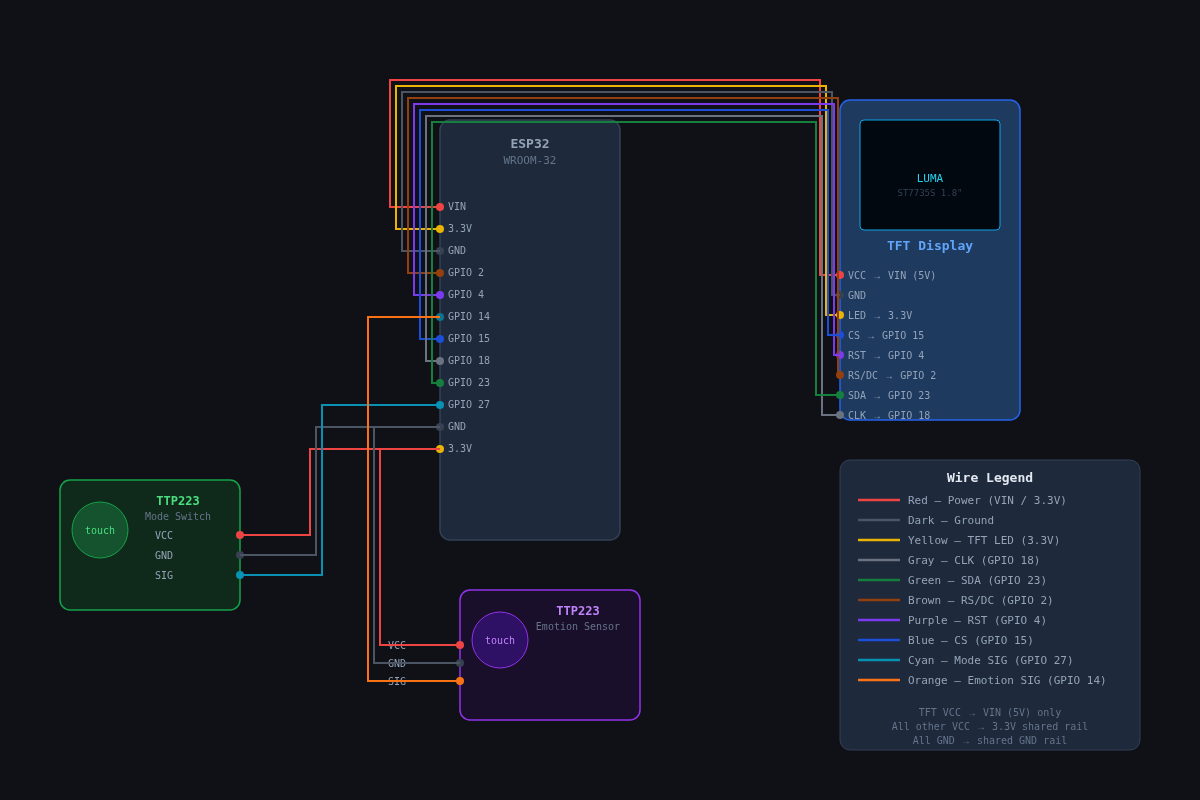
Full pin mapping on the right. Colours match the wires in the diagram.
| Module pin | ESP32 |
|---|---|
| VCC | VIN5V rail |
| GND | GND |
| NC | —leave unconnected |
| NC | —leave unconnected |
| NC | —leave unconnected |
| CLK | GPIO 18 |
| SDA | GPIO 23 |
| RS | GPIO 2 |
| RST | GPIO 4 |
| CS | GPIO 15 |
| LED | 3.3V |
| Module pin | ESP32 |
|---|---|
| VCC | 3.3V |
| GND | GND |
| SIG | GPIO 27 |
| Module pin | ESP32 |
|---|---|
| VCC | 3.3V |
| GND | GND |
| SIG | GPIO 14 |
Enclosure
Firmware
Grab a free OpenWeatherMap API key, drop it in the firmware config, flash it from the Arduino IDE over USB-C and that's it.
The current firmware build, ready to clone, flash and tweak.
git clone https://github.com/Eben-Siyabalapitiya/LUMAExtras
Print the LUMA enclosure in the colour of your choice. Supports are only needed on the main brain compartment where the components sit.
Swap the long flashing cable for a short USB-C lead so the robot sits cleanly on the desk with no slack.
Drop in a LiPo and a small charging module if you want LUMA to run untethered. Small firmware changes are needed for the sleep cycle.